


This Location Lighting Trick Solves a Big Problem
This Location Lighting Trick Solves a Big Problem
You really don't know the problems that can occur on-assignment, until you are confronted with them.


Hi, I am Charlie Borland and welcome to my All About Photography newsletter. I have been a pro photographer for over 40 years and have a lot to share with you. Please join the photo adventure by subscribing to this reader-supported newsletter.
This Location Lighting Trick Solves a Big Problem
Lighting is everything in photography and we all know that. Sometimes natural light is all we need and other times it’s better to use supplemental lighting. Then other times, we mix both types to achieve a different look to the lighting and occasionally, the two sources conflict.
On one assignment I had photographing products, I ran into one problem with the ambient light, which I needed to include (using a longer shutter speed) to complete the lighting in my scene. I was shooting a campaign for safety glasses and we were setting up in a large manufacturing plant with two models wearing different styles of safety glasses.

When it came to setting up lighting I used both umbrellas and light boxes depending on the lighting effect I needed.
The problem with these large industrial facilities and the ambient light in them, is that the lights are in the ceiling and pointing down. Sure, there are occasionally windows, but the light from those does not reach the middle of the facility very well while the light from the ceiling is designed to light those areas. Bad lighting!
Would you aim for beautiful portrait lighting with only the ceiling light in your studio?
Of course not and it’s the same idea here. Look how bad the light coming down from the ceiling looks on her. It’s a safety glass campaign and the lighting needs to showcase that product.
So my assistant started moving in lights and in most scenes we used a lightbox to light faces and umbrellas to light the subjects from behind and some of the backgrounds. We moved from location to location capturing them pretending to operate machines, move inventory, and more.

If you are enjoying this post, please share it.
The Last Setup
Then before we wrapped up, the art director requested we shoot head shots of the models looking both at the camera and away, smiling, and not.

First, we searched for a suitable background behind the models for clean head shots. Here we can see the logo in the background of another company’s products and clients never like this. You either find a different spot with no identifying trademarks or retouch it out. I chose to move around and eliminate that logo and reduce retouching time.
The other thing about the background is I purposely set 200mm on my 70mm - 200mm lens, and used f/8 to throw the background out of focus. Again, this was to reduce image processing time. The background only needs to look like an industrial texture.
The above image was also my very first test photo to get an idea on how the available lighting will appear in the photo. There were some problems!
First, amber color exists even though I am using Auto White Balance mode. So, I measured the color balance with my color meter and then gelled my strobe lights to match the ambient color before countering with white balance settings on the camera. The other problems are reflections and the ambient lighting angle.

For the lighting setup, I decided to use umbrellas both front and rear with the key umbrella on the left of the camera and the rear umbrella in back and slightly right. You can see the face is lit and there is a rear edge light on his neck and cheek from the rear umbrella.
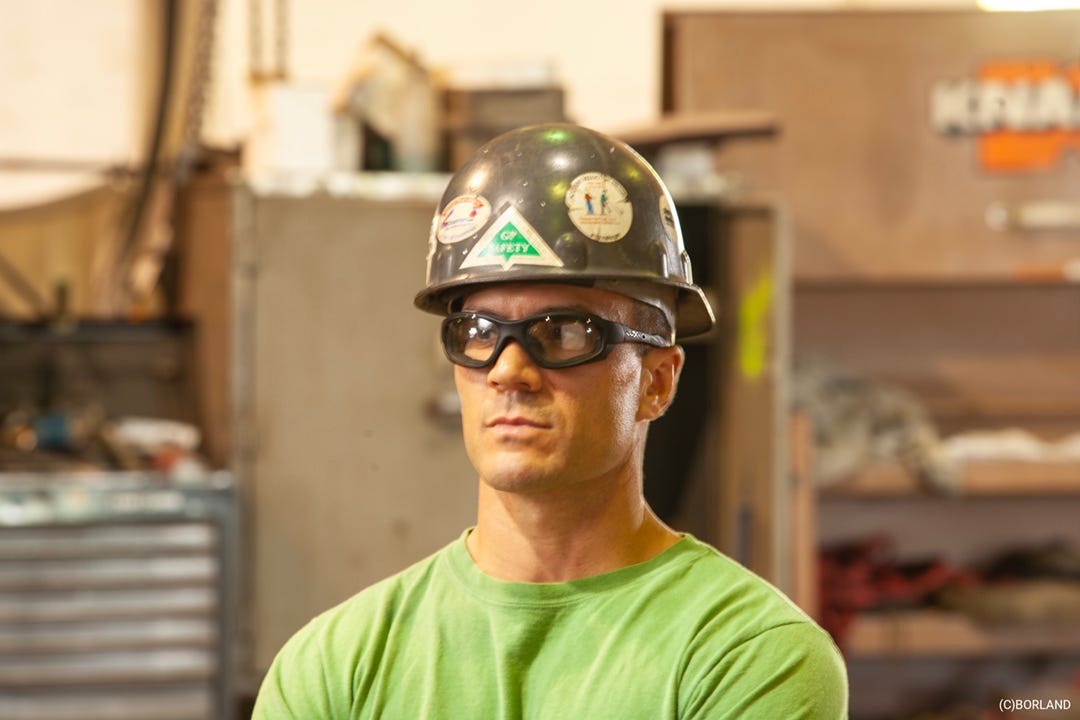
The other problem is reflections on the left side and you can see my lightbox and umbrella reflecting in the glasses.
To solve that without retouching, which is difficult anyway to get the eye to appear where the hotspot is and look real. So I ask the model to lower their chin slightly and/or raise the lights higher, and just keep making fine adjustments until it works. Then the right eyepiece has a square reflection from the fill reflector and the solution is to do the same as the other side.
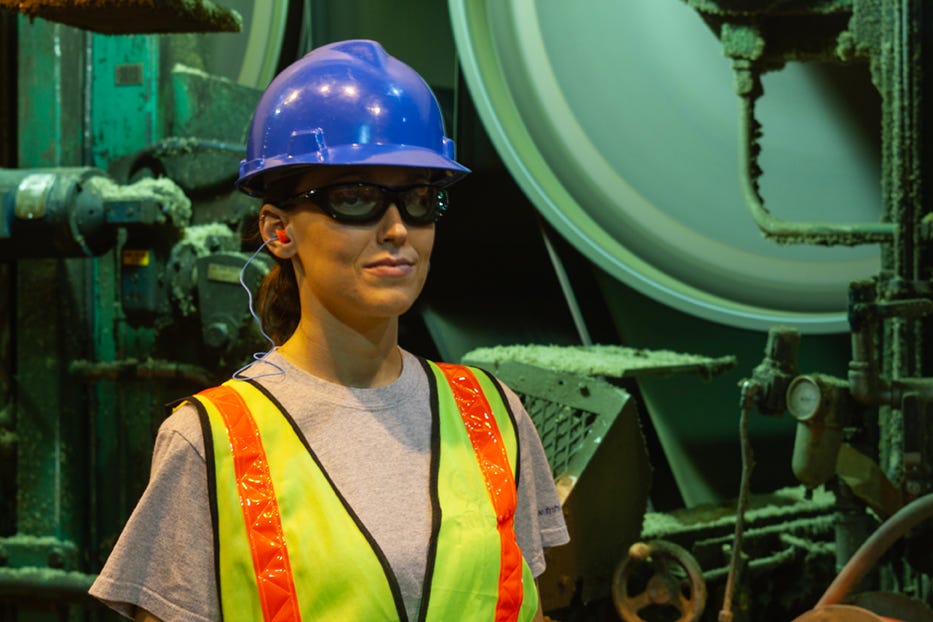
The Female Model

I next moved to the female model and their are a few of the same problems but notice that her glasses don’t have major reflections. This could be from them being a different style of glasses and her chin is down and I raised the lights and reflector higher. That eliminated many of the problems we started with but there is still one glaring problem.
The Ambient Light
I mentioned earlier about the ambient light coming from above and that is the case here, but there is also a giant door open to the left that helps with the ambient light, but only the lighting contrast.
While I was in photography school in the latest century, I listened to a talk about lighting for cinema by one of the film department instructors. One tip he mentioned was when observing lighting contrast, look at the scene and squint your eyes to observe how much lighting contrast there is. I have done this ever since.
Squinting may not work while looking at an on-screen image vs the real set, so I did it for you by processing the image.

This is KINDA what I see when squinting at the picture and it is a bright nose sticking out of her face, plus the shadow cast on her neck.
This is a campaign for eyewear, the star of the photo.
That has to be fixed! If you have been reading this newsletter for awhile you may remember THIS POST using the light panel for blocking light and then adding a strobe to light the subject? Sometimes you have to come up with solutions for seemingly small problems that are really big problems. So here is the solution.

This is the lighting setup after I raised the lights to reduce reflections in the glasses. The key light is left of me and lights her face. The far right and in the rear is the rear edge light adding light from behind. The light panel is just for fill light.
If you are enjoying this post, please share it.
Then there is a light and black umbrella right next to her and aimed down. That light does not even have a power cord attached because it is not there to add light but rather remove light by casting a shadow on her head.

Looking again at the before image you can see a dark shadow under helmut and cast across her neck and this is mostly from the ambient ceiling light adding light. You can tell because the shadows edge is hard.

Then I added that umbrella next to her to cast a shadow downward. Her face is perfect, there is no hard edged shadow on her neck, and the background brightness remains the same.

Then to create this final image, I selected her by using Select> Subject. After making sure its a good selection, I went to Select> Inverse so the background was selected. I then used a Curves Adjustment Layer and darkened the background some to make her standout and separate even more from the background. Finally, using the same mask, I blurred just the background slightly with Gaussian Blur.
That’s it my friends. I hope you learned a new trick in case you are ever in the same situation.
Subscribe and get these tutorials delivered to your Inbox.
If you like this post, have comments, or questions, please post a comment.
Note: To my awesome subscribers: thank you for being a subscriber and if you are, you may notice a slowdown in my newsletters. That is because we are selling our house and moving. It’s a big job with the house, the property, selling stuff on Craigslist, and planning a garage sale.
But as Awhnald said: I’ll be back!
Support this Channel: Take a Photography Class

Online courses on Architecture and Real Estate Photography, Landscape & Nature, Professional Commercial Photography, Professional Nature Photography, Wireless Flash, and more. They start as cheap as $9.99.
Click HERE


Brilliant move with the umbrella next to her.
Good stuff. Good to know.
I especially like the part about filtering the flash to match the ambient light's color, then adjusting the white point in the camera. I had never thought of that. It neatly solves that nasty problem of mixed light.