

Create Your Own Shade for Problem Outdoor Lighting
Create Your Own Shade for Problem Outdoor Lighting
Outdoor photographers want sun or shade, until they don't.

Hi, I am Charlie Borland and welcome to my All About Photography newsletter. I have been a pro photographer for over 40 years and have a lot to share with you. Please join the photo adventure by subscribing.
Create Your Own Shade for Problem Outdoor Lighting
Do you ever have problems with your outdoor lighting? One day you want sun and another day you want shade for that perfect light, but you may not get what you want when you want it.
Outdoor lighting is always at the whim of nature and photographers are stuck with what they get. Portraits captured outdoors don’t always look great in the sun or on a cloudy day. But, whatever light you might get, there are techniques that help create a great photo no matter the conditions.
The Assignment
I was photographing an annual report for a public utility when one of the assignments was scheduled right after sunrise. My assistant and I arrived and began setting up the photo gear on the side of a country road to photograph gas line installation when I asked him to stand in for a test photo.

That test photo indicated that the early sunlight was going to be harsh and the hard sunlight would have made the worker look more like this portrait. So we needed to set up additional gear to block the sunlight from hitting the subject. Yes, we could have used a reflector or flash fill, but the harsh sun makes people squint their eyes as she is doing here. Instead, we used a panel to block the sunlight and that light quality worked much better.
If you are enjoying this post, please share it.
Equipment
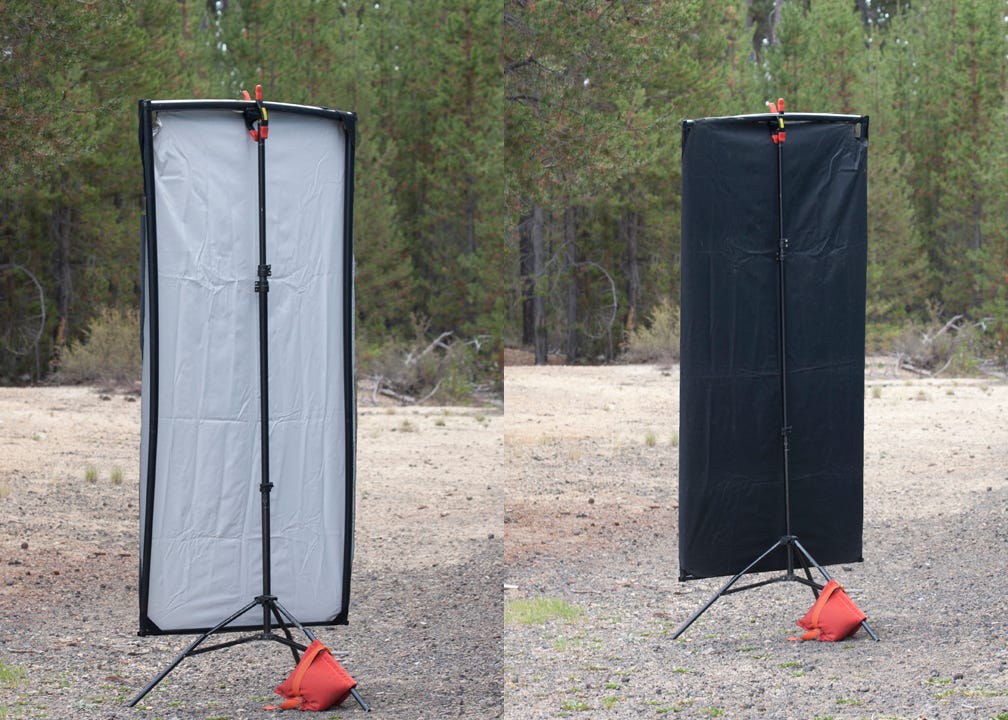
To employ this technique, you need a light panel that is black. Mine is black on one side and white on the other so I can use it to block light or bounce light at the subject. You also need heavy-duty light stands and definitely sandbags in case it is breezy.
Lighting
We set up the light panel with the black side facing the subject and the white side facing the sun and positioned it to block the sun from hitting him and he was then in the shade.
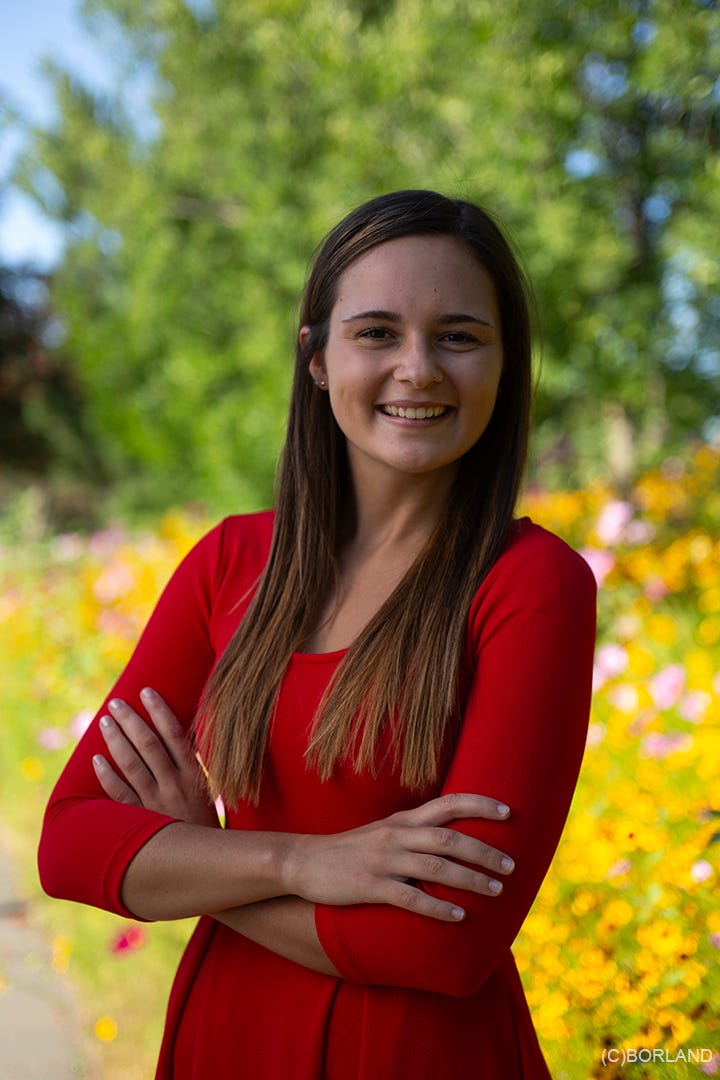
But the key to this technique is to relight the subject so he does not look like this portrait where she is dark because we created shade on her.
Subscribe and get these posts direct to your inbox.
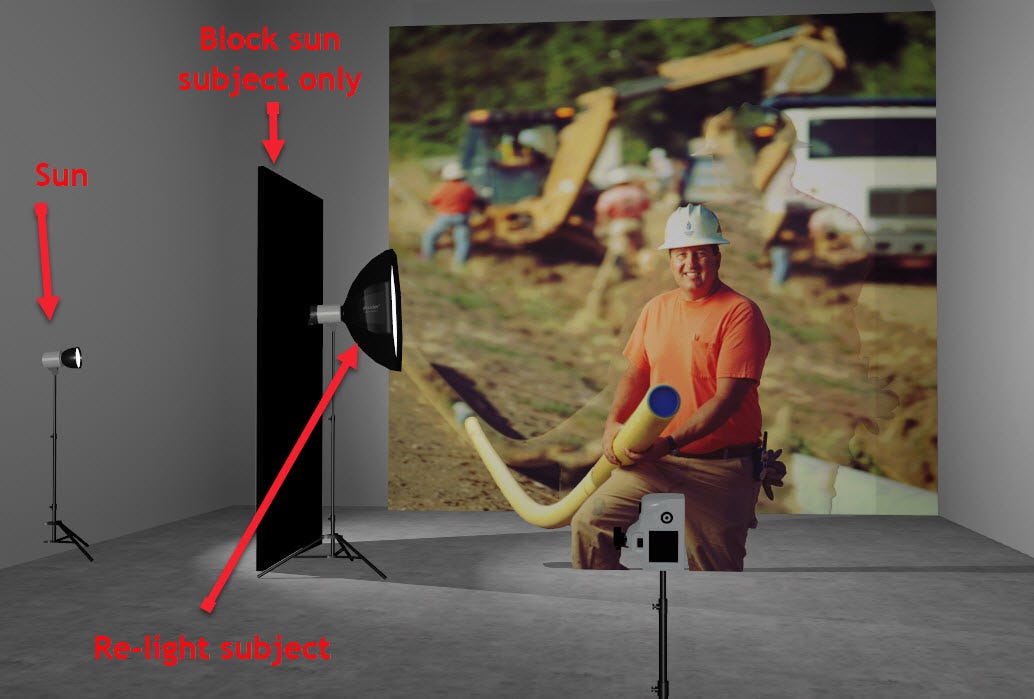
This diagram is created in my 3D software and while not exactly size proportional (the panel is too small and his legs are cut off), it shows the lighting setup.
To solve that dark shade cast on him, we added the strobe but since we did not have a power outlet to plug into, a portable battery-powered strobe was used instead. That strobe was set up on a light stand with a lightbox and this softened the light and reduced the lighting contrast. It was then positioned to add a split lighting pattern on him and this soft quality of light is much better than the harsh sunlight.

Setting Exposure and Power Levels
To set the light levels for the two light sources: the strobe and ambient sunlight in the background, we started by taking test photos to establish the proper background exposure. I believe it is much easier to establish perfect settings for the two light sources when one is set first, then the other.
Subscribe and get these posts direct to your inbox.
I start with the ambient background exposure by simply taking test shots at different shutter speeds. Once the shutter speed is locked in, I turn on the battery-powered strobe and take a few more test photos with the flash on. I will increase or decrease the flash output level to make him brighter or darker until the balance with the ambient light is perfect. My exposure was: f/5.6 @ 1/500 ISO 100
Important: all this testing is done with my assistant and once settings are locked in, we bring in the worker so as not to keep him from working for more than 15 minutes.
The key point to remember is that you are blocking the light you don’t want (sun) from hitting the subject, then re-lighting them with the light quality you want.
That is it for this technique and it can be used on lots of different subjects, just not outdoor portraits.
Keep shooting!
Have you done this type of work? If so, please share by posting in the comments and tell us how you did it.
If you are enjoying this post, please share it.
Equipment Used Here
Support this Channel: Take a Photography Class

Online courses on Architecture and Real Estate Photography, Landscape & Nature, Professional Commercial Photography, Professional Nature Photography, Wireless Flash, and more.
Click HERE
Buy Us a Beer
We would love to have you as a subscriber, either FREE or donation, but if you are not ready to be a subscriber. Consider buying us a beer.


Hey Mark, yes I use diffusion panels and they are great, but the difference between them and this strobe technique in this example is that you can increase or decrease the strobes power and brightness and make him much brighter than I did while making the background darker, achieving more lighting separation. The panel does not have that kind of control nor allow you to move the diffusion panel position and angle like the strobe does.
Have you ever instead used s large diffusion panel for this type of situation, placed exactly where your black panel is, maybe a bit closer to the subject?