


The Girl With the Colored Tattoo
The Girl With the Colored Tattoo
When this model arrived to my workshop, my creative ambitions kicked into overdrive.


Hi, I am Charlie Borland and welcome to my All About Photography newsletter. I have been a pro photographer for over 40 years and have a lot to share with you. Please join the photo adventure by subscribing to this reader-supported newsletter.
The Girl With the Colorful Tattoo
It was Saturday afternoon when I was scheduled to teach a 3 hour introduction to portrait photography workshop at the Cascade Center for Photography. When The Center scheduled any workshops that required models, they chose that model from a stable of talent who had got their name on the list so we instructors did not have to ‘bring our own.’
I had arrived early to set up a basic portrait setup and get my presentation ready before anyone arrived and minutes before our start time, in walked our model and I did a double take.
She was perfect! Not only for the workshop, but perfect for my endless ideas for portraits i would like to take of people. She was not only attractive, I mean ‘photogenic,’ but the tattoos…
Yes, the tattoos!
I was thrilled! The ideas churning through my brain for different portraits I would love to capture of her, were endless. She apparently was tattooed head to toe and the work was stunning.
But, I needed to come down to earth and teach so I dived into a 45 minute presentation on the basics of lighting and posing, then we took a break before I demonstrated basic lighting techniques before I broke from my initial plans and dived into one idea we could do during the workshop: a black on black approach.
If you are enjoying this post, please share it.
Black on Black
That was my idea, black on black. A subject that’s almost black on a black background. While she was not totally in black, then it was not truly black on black concept and that was okay because it was a portrait after all. For me, the tattoos that were almost as important as her face and body and I wanted to emphasize them.

If you wonder what black on black looks like, these two images are just that. The difference is that the left side still has the model but the flash did not fire while in the right side it did. This is also a full length portrait, but you can’t see her legs because there is no light on them. That will be the challenge, creating tonal separation.
A successful black on black photograph requires some light to work.
That is the key! You need light to create separation between the two black parts of your scene and you do that by adding light to make either the subject or background, a very dark grey.

This may difficult to see but defines the theory. The left circle could be viewed as being lit as it is brighter than the background. The right circle is darker and the background is lighter so this could be viewed as lighting the background instead of the subject.

This diagram showing the model is all set for black on black, but you can see that her apparel is merging with the background and does not work well.

By bringing in two strip lights and placing them slightly behind her and aimed at her sides, there is now light on her that separates her from the background. The sides of her arms and legs now have highlights resembling that very dark grey tone.
Lighting the The Model
When it came to deciding how to light my model, the goal was the same: to create tonal separation. So I examined where black would meet black and determined how to create that separation. One tone will be dark grey and one tone will be black.

In this test photo, the arrows indicate the areas where we should have tonal separation and we do. The key light on the left lights the hair the rims her face, but subtly. The arrow right shows where I chose to light the background instead of her to create separation.

This diagram of this first photo showing the key light left hitting her front side and a white reflector below her bouncing light up as a fill source. The right light box is feathered towards the background to add light on the background behind her and no light hits her.

This image is the same lighting and just a change in pose. There is still perfect separation between her and the background, but because I zoomed back a bit, the grey studio floor shows. So we unrolled more paper and moved it closer to her to fill that gap. But the floor would be easy to convert to black in Photoshop.
Subscribe and get these tutorials delivered to your Inbox.

I next decided to feather the background light away from the background and more towards her backside to place a highlight on her hair.
By feathering the light away from the background, but not to far, a little light still hits the background but more light hits her and you can see the beautiful highlight on her hair and those two tonal values create subtle separation. At the top is the pole that holds the back background.
Since I captured portraits with both background light approaches, I liked both versions and could not decide.
Final Images
I continued with the workshop students showing basic techniques on key/fill light arrangements and accent lighting and letting all students take photos with the their cameras. Once everybody was done and started to leaved, I offered the model $30 if she would stick around for another hour for more photos and she agreed.
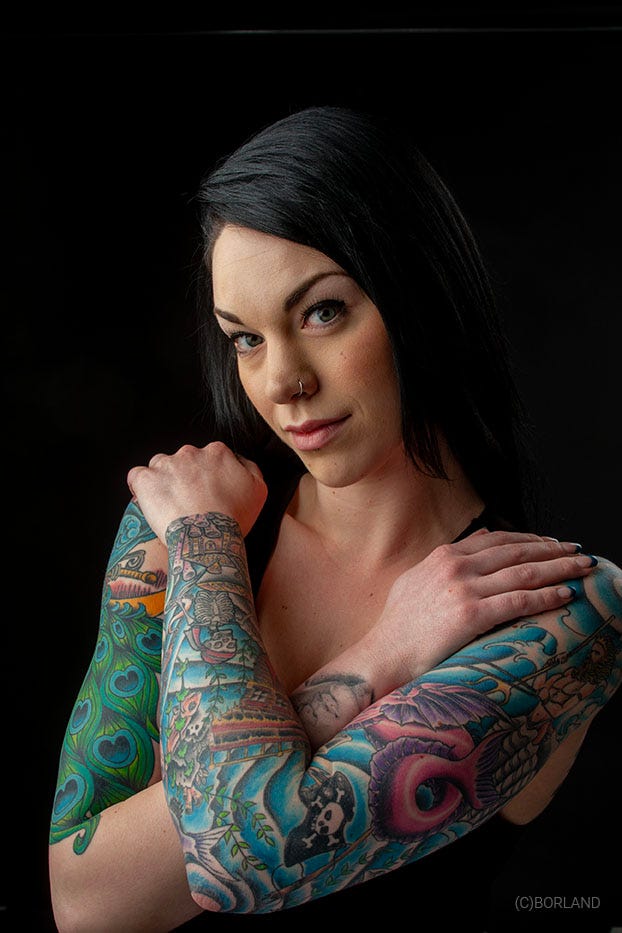
While I captured a ton of poses, these two are my favorites and every image was processed differently while I explored the look I wanted.

The processing was pretty straight forward with a bit of dodging and burning and saturation.
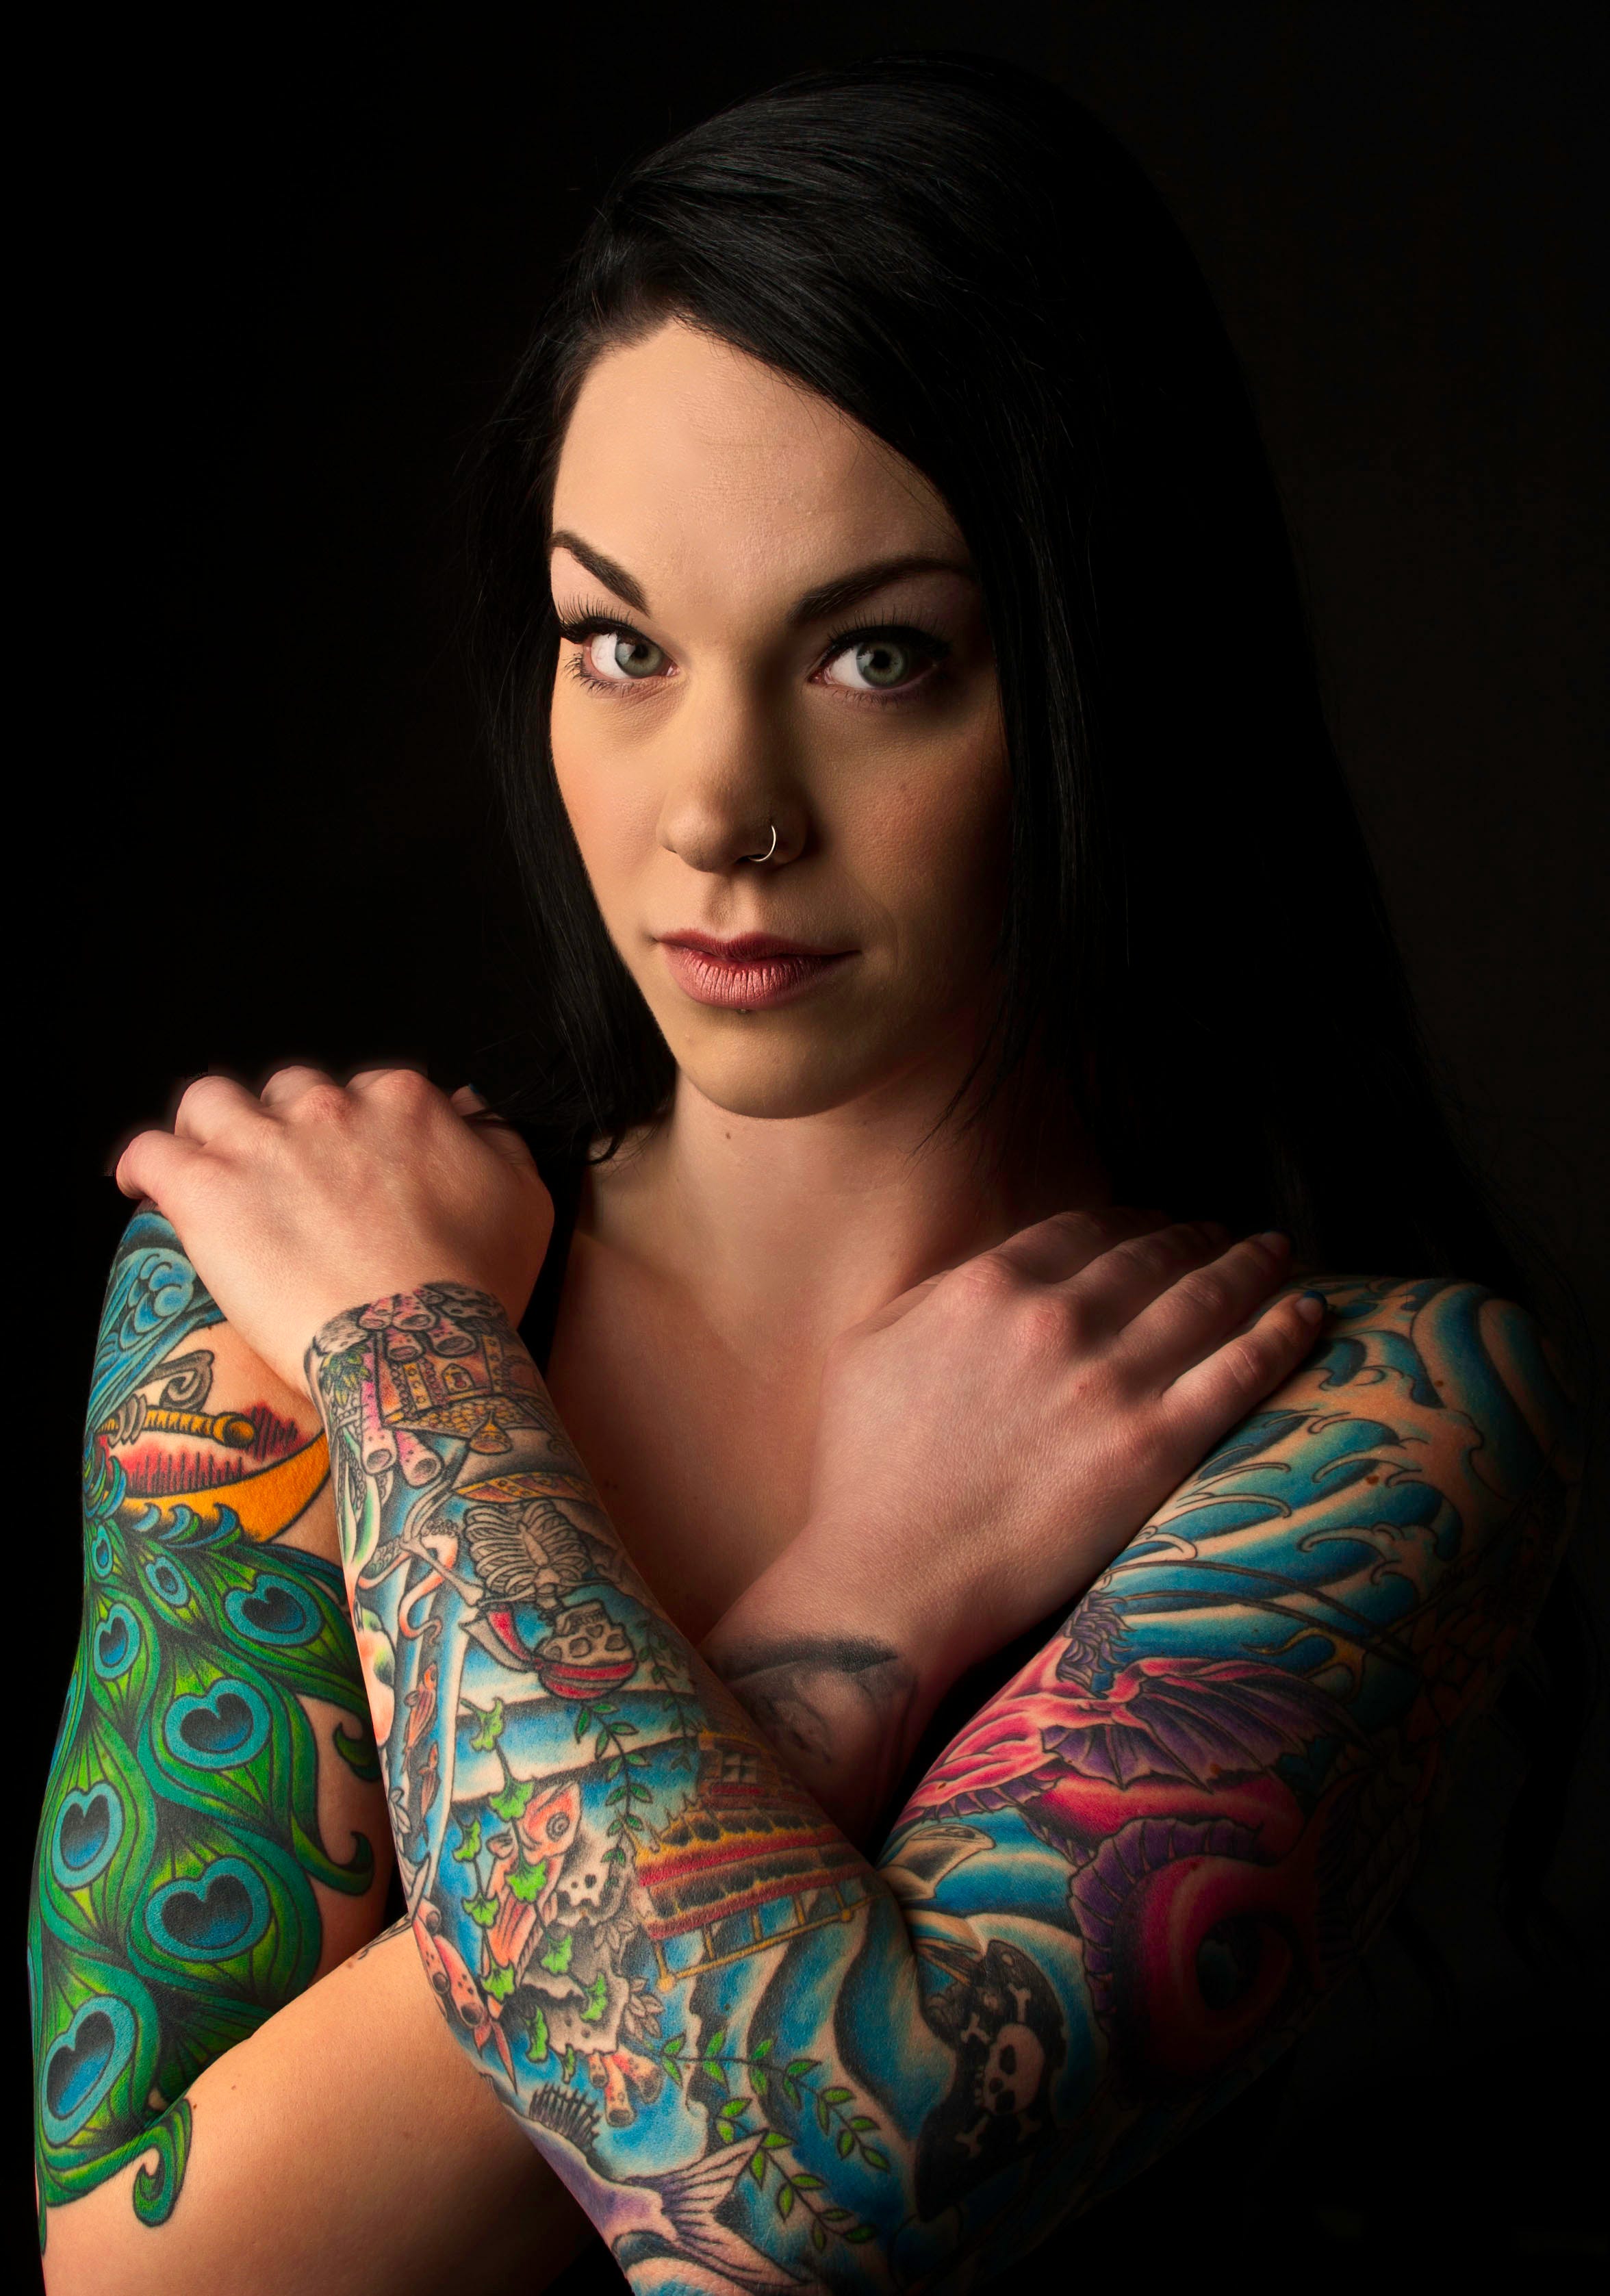
Processing here included burning and dodging and a bit more saturation and a darker look.
Subscribe and get these tutorials delivered to your Inbox.
1/2 Black and White
This technique is one I use from time to time for people, landscapes, and more, where I leave important color areas as color and convert the rest of the image to black and white and it is not hard to do.

The strategy is to select the color areas you want to keep as color.

Using the Quick Selection Tool, I selected the color areas which were the tattoo. Since other areas will be selected, or not selected, you need to tune the selection and I prefer Quick mask Mode to do that.

Then the selection needs to be inverted (Select> Inverse) so the areas that I don’t want to remain color are selected.

Next, add a B&W Adjustment layer to convert that selection to B&W.

Then, adjust the sliders to taste on the B&W areas. The red and yellow sliders had the most effect for the B&W areas of her.

The last step was the addition a Hue Saturation Adjustment Layer to make the tattoo really pop.
If you are enjoying this post, please share it.
I hope you enjoy this tutorial and please leave a comment, share this post, or become a subscriber if you are not at this point.
Keep shooting!
Support this Channel: Take a Photography Class

Online courses on Architecture and Real Estate Photography, Landscape & Nature, Professional Commercial Photography, Professional Nature Photography, Wireless Flash, and more. They start as cheap as $9.99.
Click HERE


What a great tutorial! Thanks for sharing it!
Very interesting techniques and setups Charlie!